Laser Cutting
Posted:
Laser cutting with plywood, acrylic glass, or paper can be fun! In this post, I'll share which laser cutter I bought last year, what I created so far, and what I learned along the way.
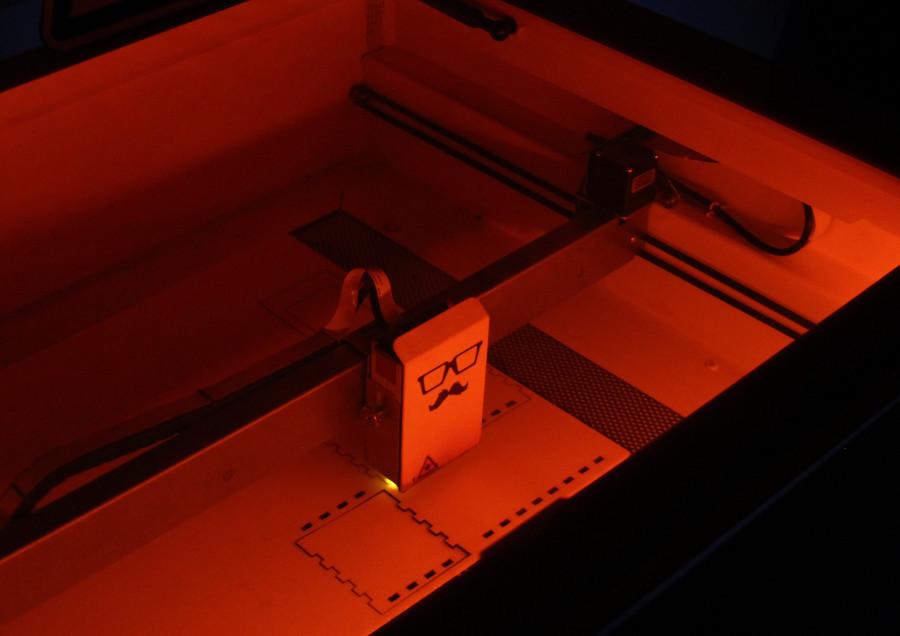
While 3D printers look interesting, working with wood (instead of plastic) appeals more to me. So I decided to buy a laser cutter instead of a 3D printer last year. I went for the Mr Beam II Dreamcut. It's a bit pricey, but I wanted something without any hassle and without needing some cloud connection (Mr Beam provides an offline web UI in the local WiFi). Delivery and unpacking was very smooth. I also ordered a pack of 3mm plywood to get started. Here the Mr Beam in action making some plywood box walls:
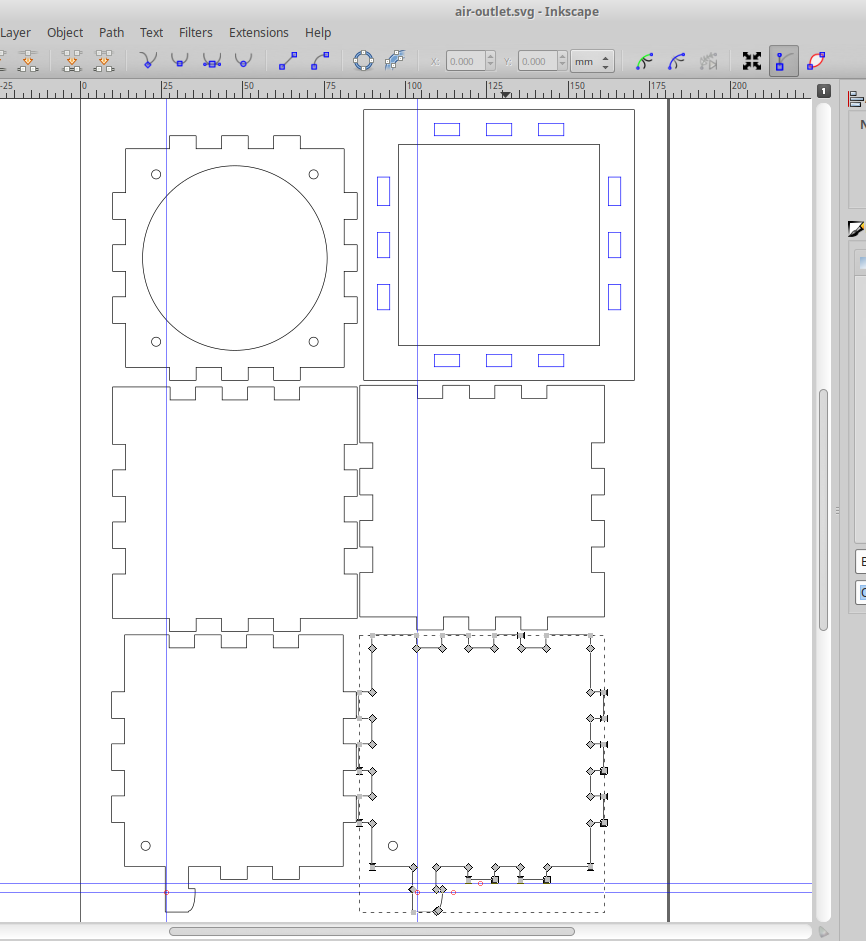
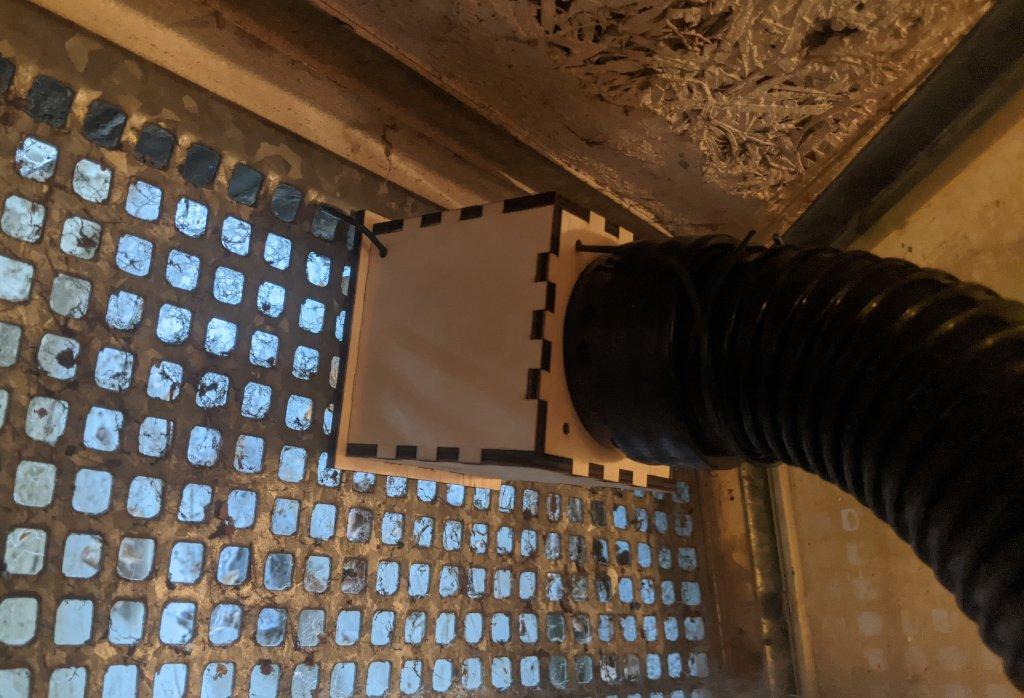
Laser cutting produces a lot of bad fumes from the burned material. Plywood smoke is no fun to inhale. Mr Beam offers an air filter system for €690 to operate indoors. I decided to not buy the Mr Beam air filter, but instead use the provided tube and build an adapter to push the exhaust out through a metal "window". So my first laser cut project was the air outlet adapter.
First I generated a box in the right size via the boxes.py website (online SVG generator for laser cutting). Then I designed the rest of the air outlet in Inkscape on Linux:
This went pretty smooth considering it was my first laser cut project. The finished air outlet looks like this:
Materials
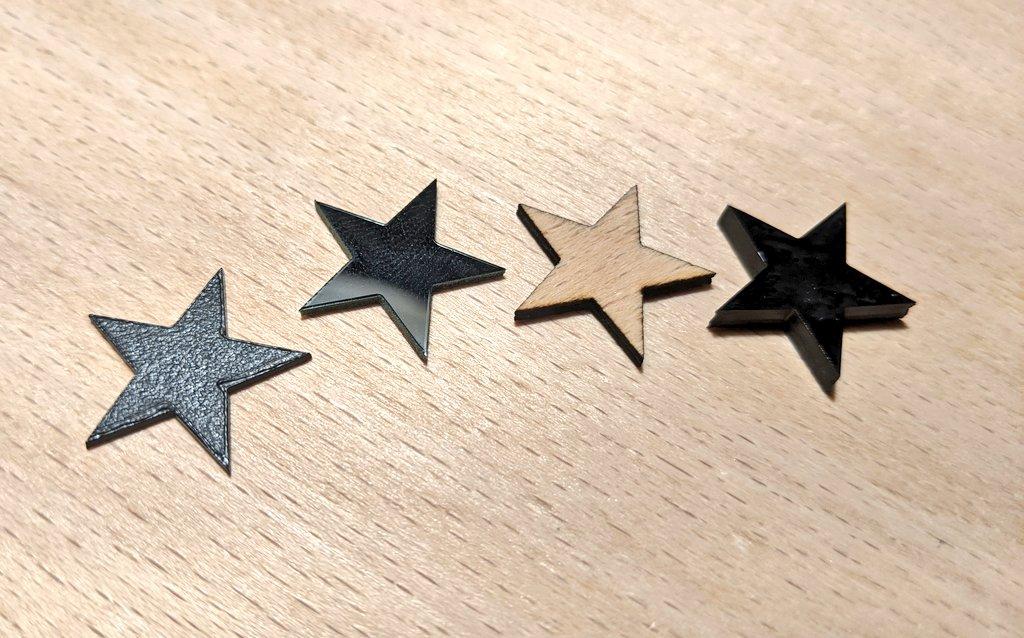
What materials can you cut? Even though the Mr Beam laser cutter only has a 5W laser, it can cut various materials. Here I tried a few materials (from left to right): 0.8mm polypropylene, 1mm acrylic glass (Plexiglass), 2mm solid wood, and 3mm black acrylic glass:
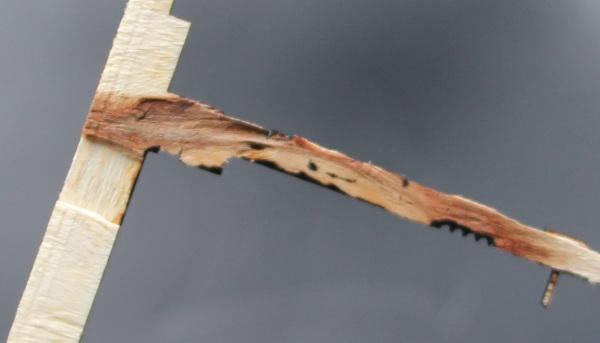
I mostly cut 3mm and 4mm plywood (poplar) which works great, but sometimes the plywood quality is very bad (e.g. uneven thickness, knotholes) and it burns out:

So far I successfully have cut:
standard printer paper: fast to cut, sometimes needs extra 100ms pierce time
0.8 mm polypropylene (grey and black): melts a bit at the edges (result does not look perfect)
3mm and 4mm plywood (poplar): my default material
1mm and 3mm acrylic glass (red and black): yields nice results
3mm acrylic felt: easy and fast to cut
colored (thick) paper: works great, but leaves some dark dust (from the color ink?)
rubber foam (Moosgummi): really easy and very fast to cut
Useful Constructions
I'm always looking for useful constructions I can make with the laser cutter. Here a selection of different things I made so far.
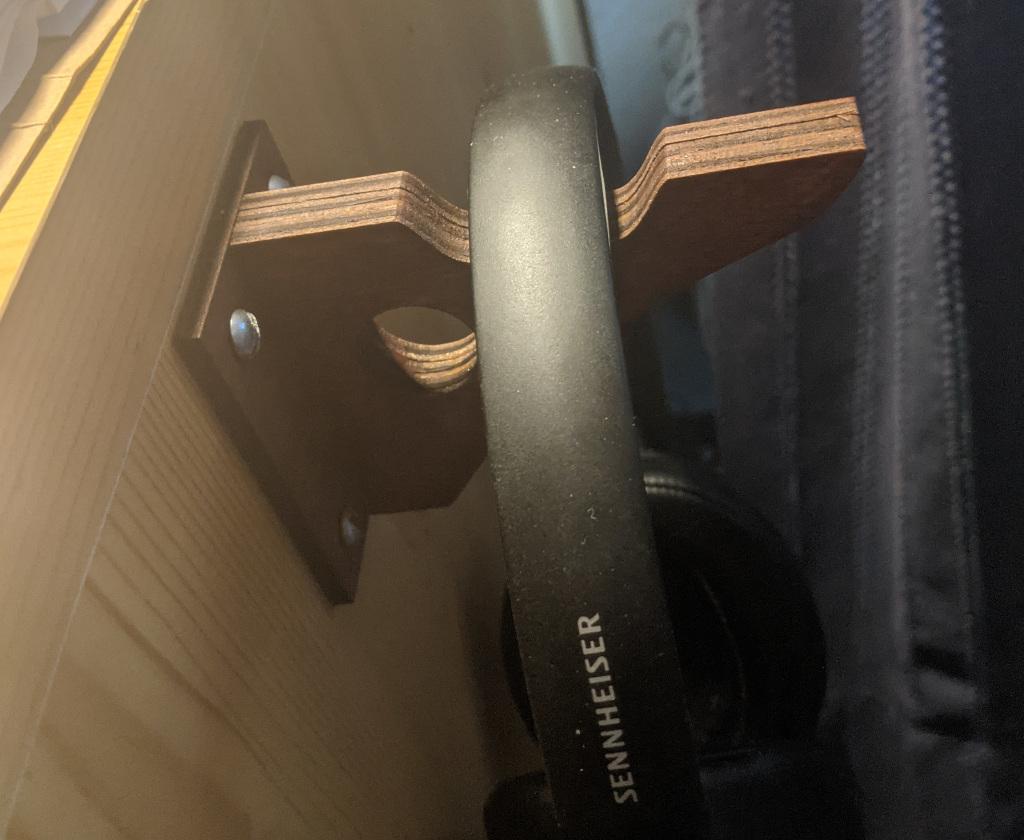
My desk needed a place for my headphones, so I created a headphone holder from 3 layers of plywood:
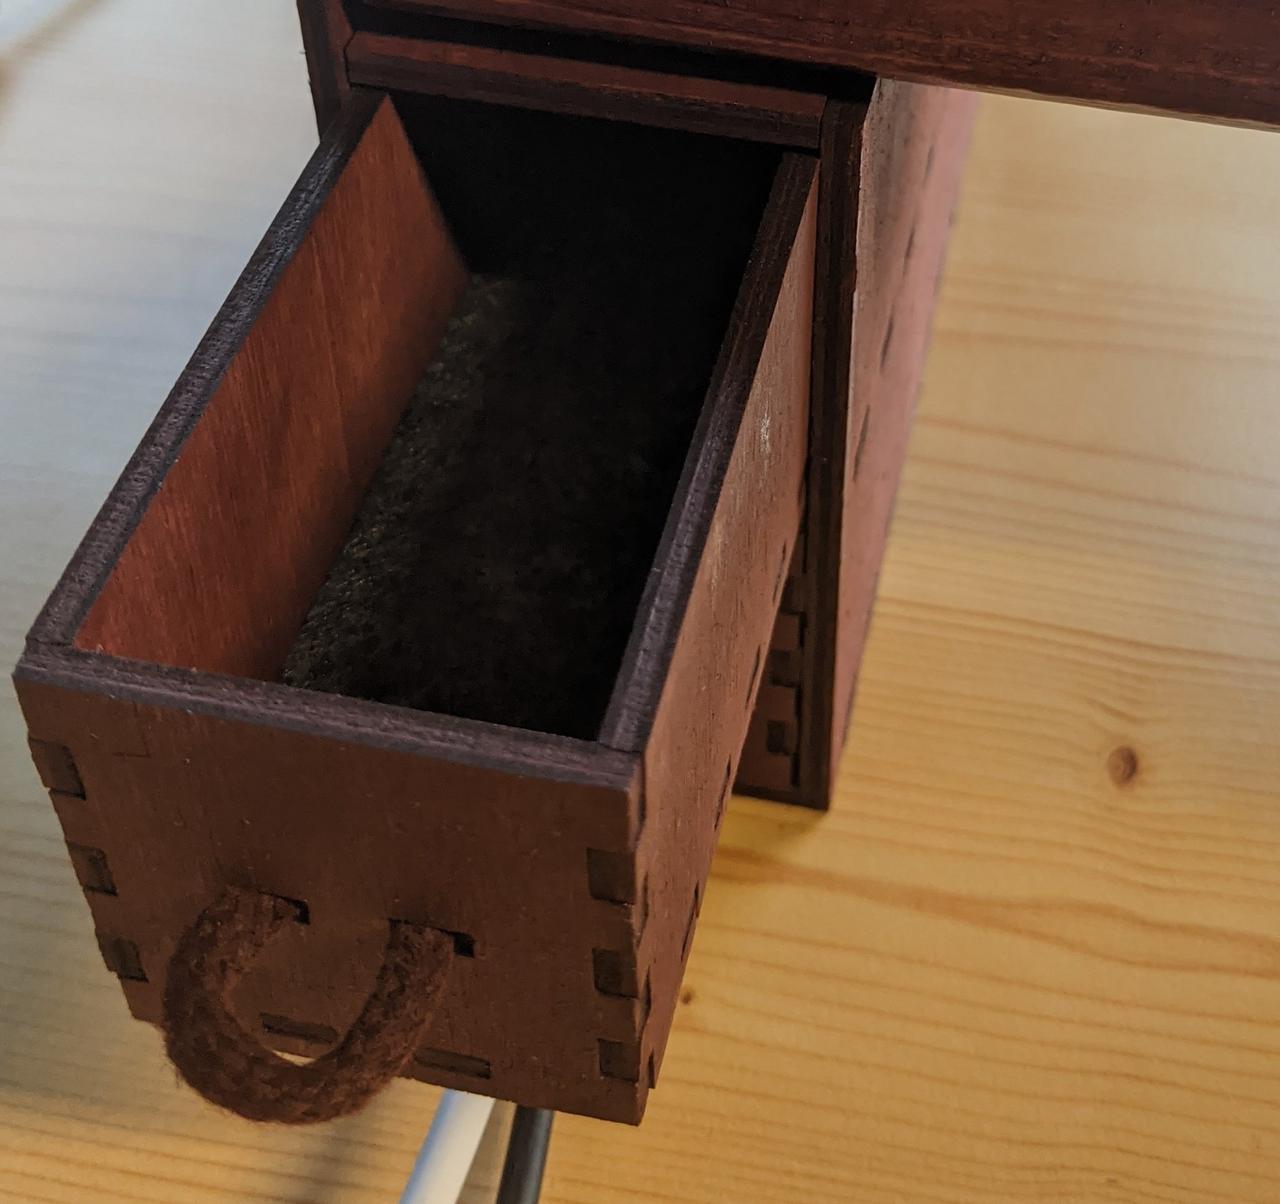
Plywood made from poplar is very soft. It's not the perfect material to lift heavy objects, but it turns out that it's surprisingly sturdy when constructing the right boxes. I needed a monitor stand for my desk which allows to store my keyboard below it. I designed two boxes with drawers and cable channels. A solid wood board connects the two boxes and has the monitor on top. Here the monitor stand from 4mm plywood with small drawers and cable channels:
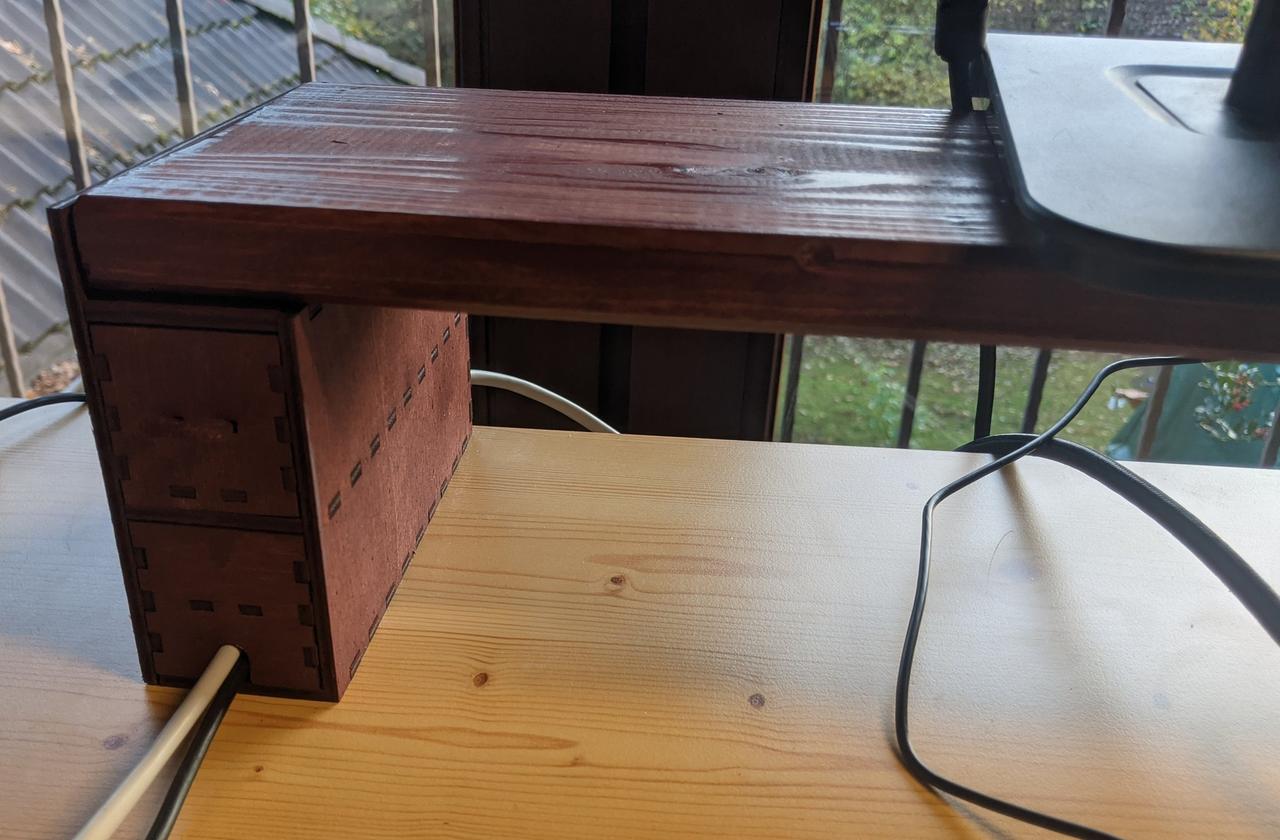
The drawers contain 3mm grey acrylic felt as soft inlay and use old shoe laces as drawer handles:
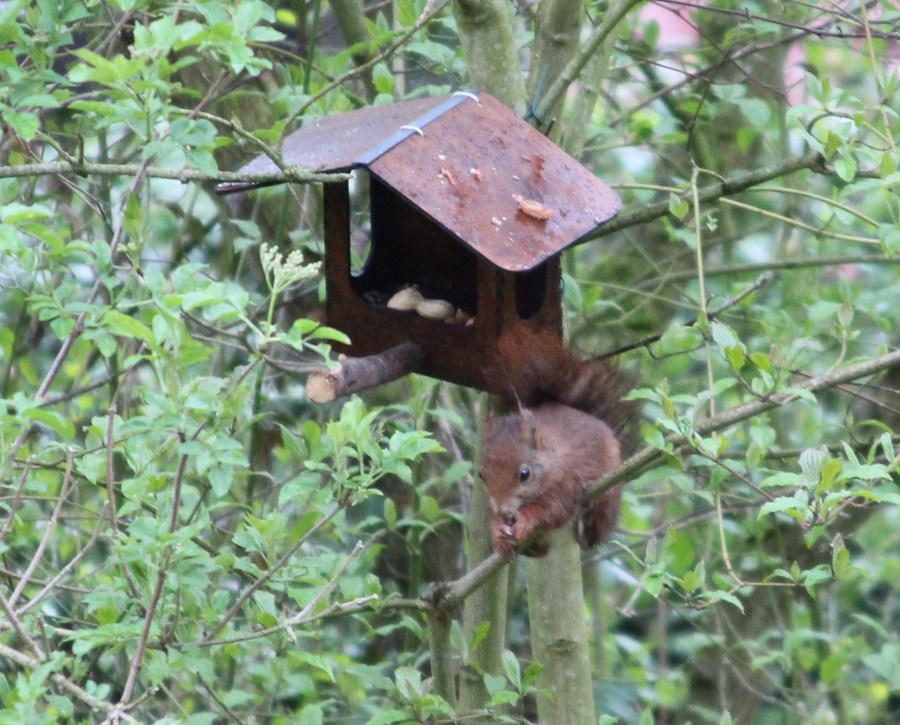
I built a food house for birds (and squirrels) out of 4mm plywood. Here a squirrel enjoying peanuts I put into the house every day:
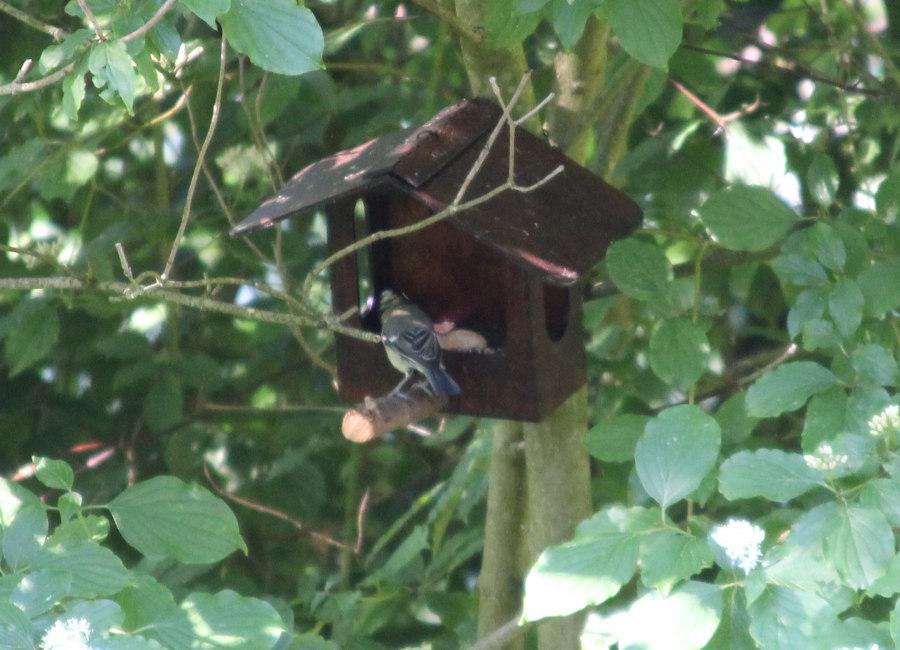
Here a great tit visiting the food house (note that the roof changed slightly as I replaced the strip of plastic with plywood):
Using 2 layers of premium paint (Sikkens Cetol Filter 7 Plus) made the plywood weather resistant. So far the wooden house survived multiple rain storms.
Other constructions I created: a cat food tray, various small shelves, drawer separators, and a tray integrated with LED lamp.
Just for Fun
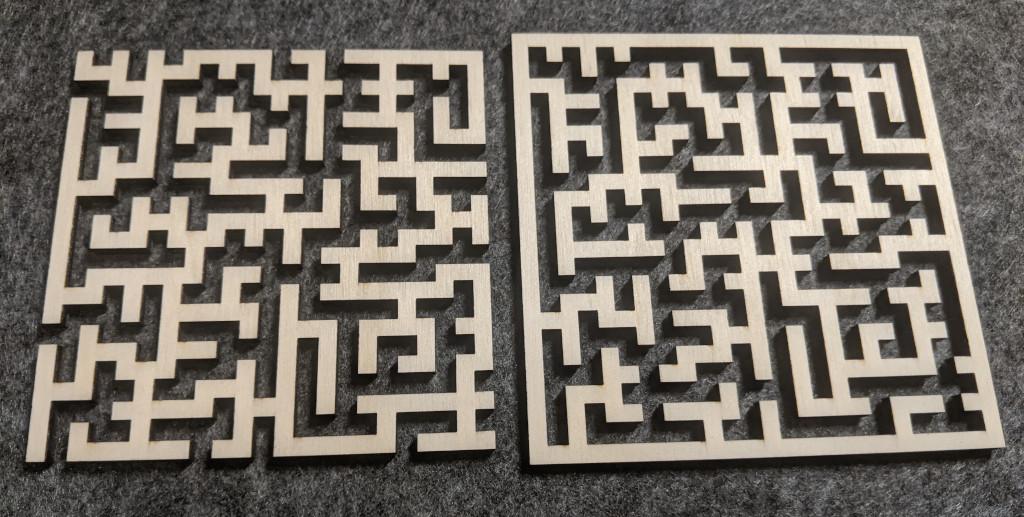
Some things I just made for fun or to experiment. For example, I played with an algorithm to construct a meander / labyrinth (Anni' Albers Meander Python generator):

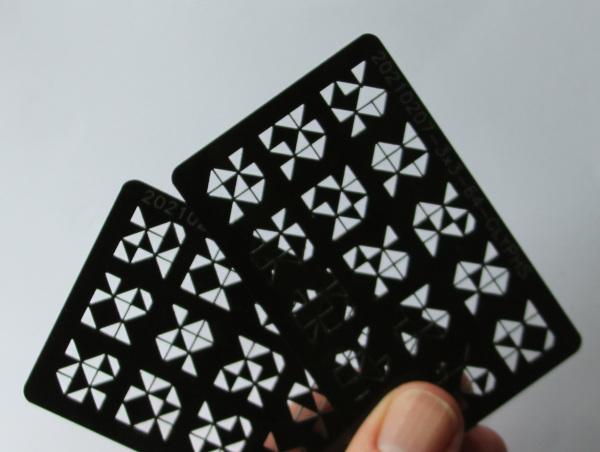
I experimented a lot with visual cryptography, i.e. cutting two cards with random holes which reveal a secret when put together. The trick is that each card is completely random and contains no information, but put together they contain information. Here two cards with completely random holes:
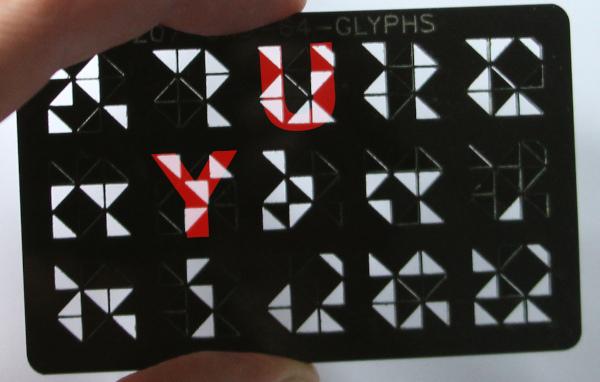
Put together they reveal glyphs ("Y" and "U" marked red as example):
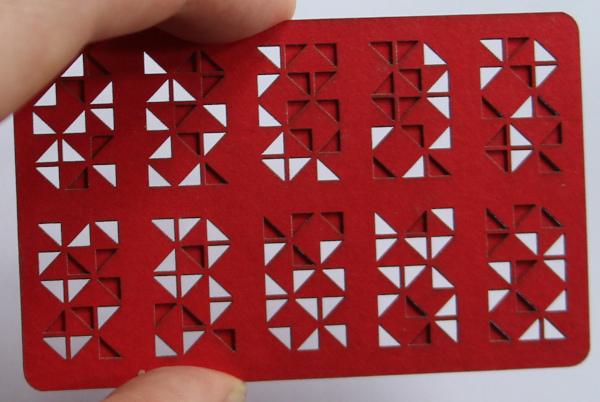
Another example with larger glyphs and red cardboard (do you find the "5", "9", and "L"?):
While visual cryptography was more of an experiment with limited value, the napkin ring actually works as a "design" object:
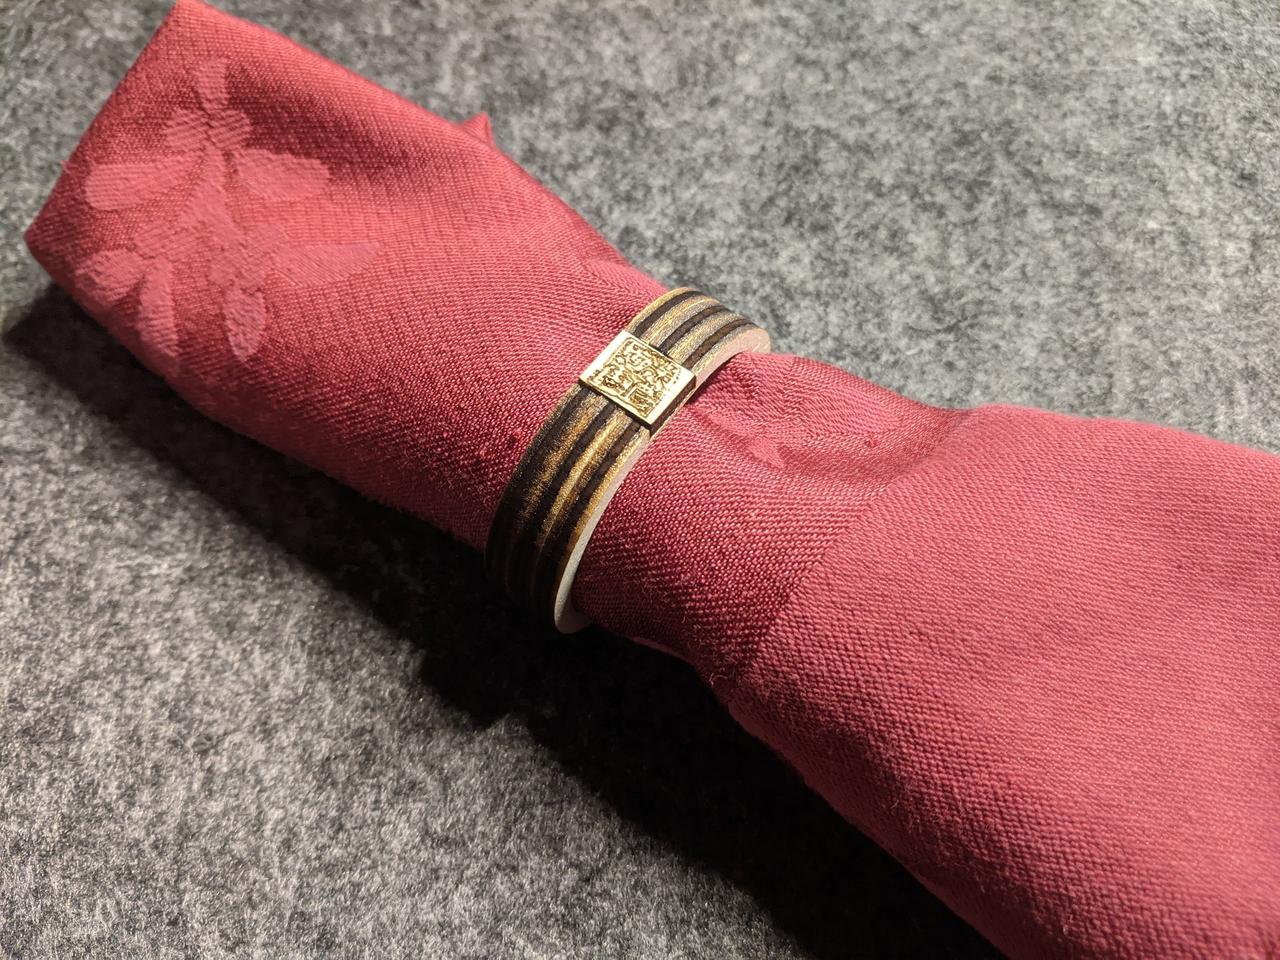
It's made from three layers of 4mm plywood:
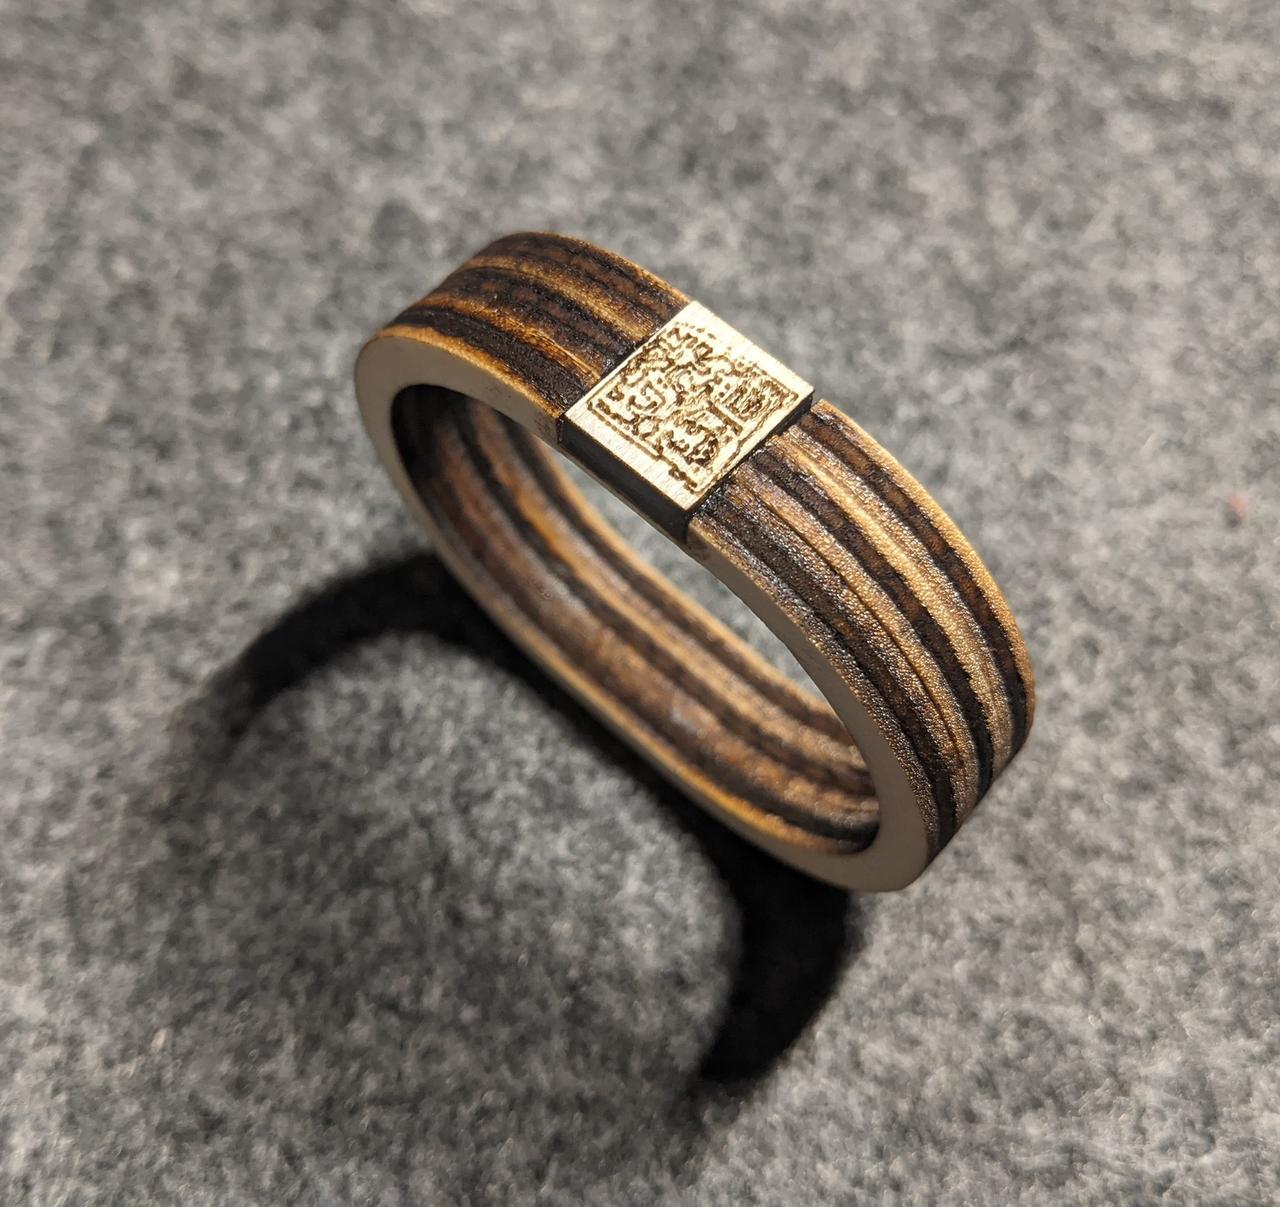
I did not paint the napkin ring as I think the natural (burnt) wood looks good in this case.
More recently I discovered that making rubber stamps from foam rubber ("Moosgummi") is really easy to do. After creating my own logo stamp, I now mark all my books with my personal logo:
Wrapping Up
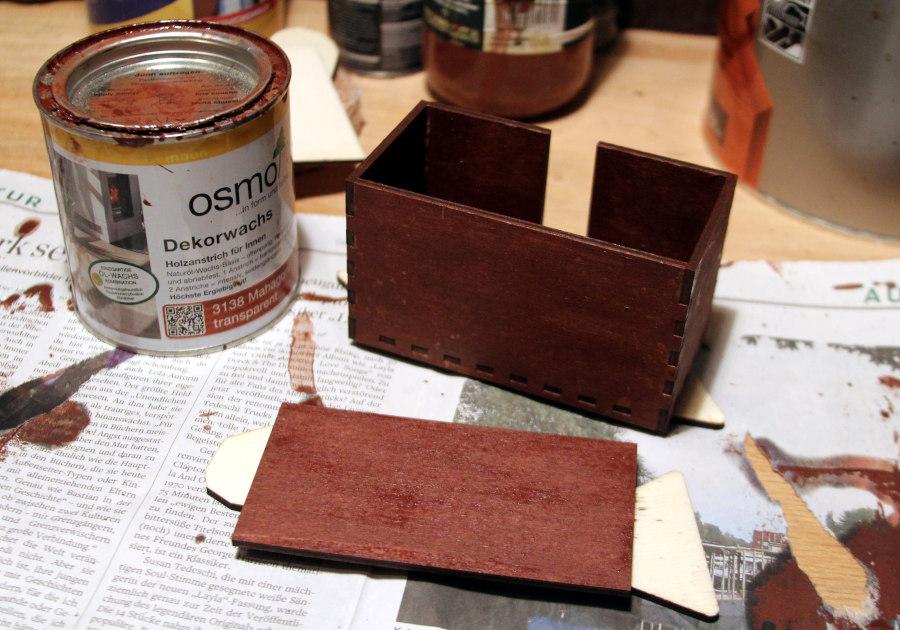
So far I have no regrets buying the laser cutter. I enjoy building little boxes from plywood for various purposes. I usually start with boxes.py and then modify the generated SVG to my needs. Painting them with an oil/wax combination (Osmo Dekorwachs, mahogany color) makes them look more valuable than they really are. As you can see, the next box is already waiting drying for its second layer of paint :-)